NOTE: Since completion of this project, 475 has replaced the DA Membrane with INTELLO X

Rowe Hill House before renovation
Jesper Kruse, founder of Maine Passive House, contacted us last Spring to discuss details on the renovation of his Rowe Hill house. We had recently finished our Foam-Free Deep Energy Retrofit (DER) blogpost and were working on our first set of construction drawings. We discussed options and collaborated on a design that offered the easiest and best way to get his house tight.
Simply put, here's the basics of our solution:
First wrap the existing occupied house in an airtight and waterproof membrane that is UV resistant (INTELLO X). It protects the house during construction and provides airtightness and vapor control inboard of the new insulation layer, right where you want it. Next, outboard of the cellulose install a waterproof, airtight, and vapor open membrane (Pro Clima SOLITEX Mento Plus). These membranes, along with Pro Clima tapes and gaskets form a complete system that assures the highest possible drying reserves for the wall by using the right membranes in the correct locations. The drier a wall stays and the faster it can dry when something does happen (construction is never perfect), the safer and longer-lasting the construction. Below is a detailed description of Jesper's process, written by the the builder himself.
---------------------------------------------------------------------------

Ecliptica windows
By Jesper Kruse:
Since the old Brosco windows on the south side of our house needed to be replaced, and we wanted to upgrade the envelope too, we decided to replace them with some very sexy, triple-pane Ecliptica windows from Denmark, as well as to add 10” of cellulose insulation to the exterior of the wall existing walls. We planned to start by retrofitting one wall first, then come up with a good system and do a different wall each year. But after doing the first wall, we decided the next step would be to do the remaining three walls all at once, mostly because the sheetrock dust settles everywhere, which is problematic, especially in an occupied house with an open design.
The house was built in 2000 (yes wooden windows don’t last more than 13 years in harsh conditions). It’s built on frost walls with a slab that has 2” of XPS foam below the slab. The walls are 2x6 spaced 24”OC with ½” sheathing and cedar shingles for siding. The roof is constructed with regular trusses with a 6/12 pitch.
The first item we tackled was creating an airtight connection to the foundation. The bottom five feet of siding was stripped off the house, after which we installed the first row of airtight DA vapor retarding WRB over the existing (nail-punctured) sheathing (475 note- Best practice for mixed climate, vapor-variable, and Foam-Free:INTELLO X is recommended here). To adhere the DA air-barrier to the uneven foundation wall, CONTEGA HF non-embrittling adhesive caulk was used. This made a ship-lapped, airtight seal at the bottom of the wall, which means the connection remains flexible since the adhesive bonds, but doesn't dry out. It also fills both the uneven concrete substrate airtightly, and allows seasonal expansion and contraction of wood wall without compromising the airseal.

475 Foundation DER detail - connection of DA/INTELLO X with CONTEGA HF
We then dug down to the footers on the hottest day of the year (94F° on the south side of the house) 4' down, 24’ across. The two of us dug down by hand, cleaned the foundation, added 10” of EPS foam and back-filled it again, all in a day. The EPS foam was covered by 30 lb felt paper to try to keep the ants out of the foam.
In the next step, all other siding was stripped and we removed the old windows. The DA weather resistant barrier was installed right over the window openings. This made the occupied house weather-tight while the windows were missing. All horizontal and vertical membrane seams were taped with TESCON VANA tape. We primarily stapled the membrane under the overlaps - and any staples we needed in the field around windows and corners, were also taped so they were waterproof and air-sealed.
Right above the new EPS foundation insulation, we built a small, pressure-treated plywood shelf as the bottom for the TJI Larsen trusses. We taped this shelf to the DA, taped seams, and finally taped the exterior WRB to this plywood as well.

Window bucks sticking through DA - before taping buck seams
In the next step the window openings were cut out of the overlapping membrane. OSB boards that would extend exactly 9.5" past the DA were nailed to the inside of the rough window openings. This edge of the OSB will be inline with the TJIs when they get installed. The corners of the OSB were structurally connected with construction adhesive, after which we taped them on the exterior with TESCON VANA 75 (475 note - use of a wider tape at outside corners is recommended, so that 1" of tape adheres to each face of sheathing). Additionally the OSB window bucks were air-sealed to the DA barrier by taping these inside corners with TESCON Profil BEFORE the TJIs were installed (this is a very important airsealing sequencing step, as otherwise TJIs would be in the way of properly taping that seam).

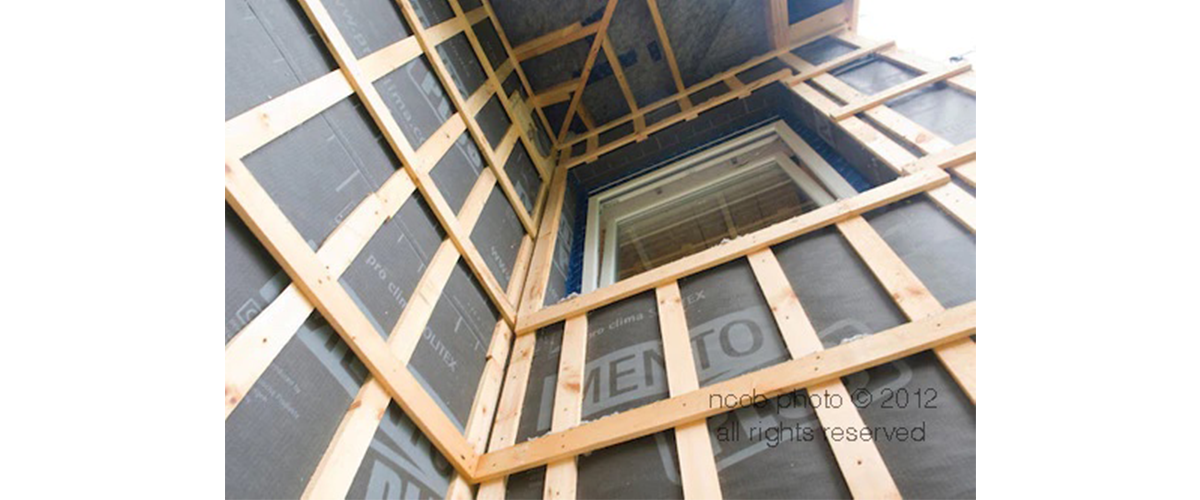
Window buck with 2x4 on edge around it, and reinforced plastic over opening - during SOLITEX MENTO Plus installation to TJIs - notice DA membrane behind cavity.
On the exterior edges of the window bucks, 2x4s on edge were fastened with screws so there would be something solid to nail to when installing the TJI’s at these bucks. However, since we needed to keep our house watertight, reinforced plastic was stapled around the window before these 2x4s were installed, which then also tightly clamped the plastic in place.
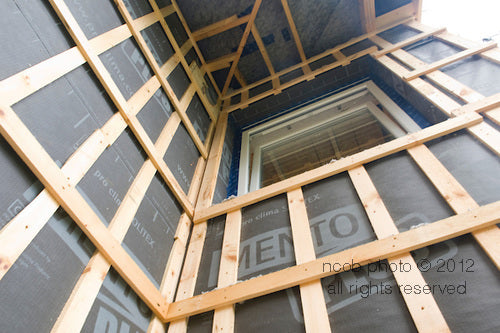
Illustration from Chris Corson house.
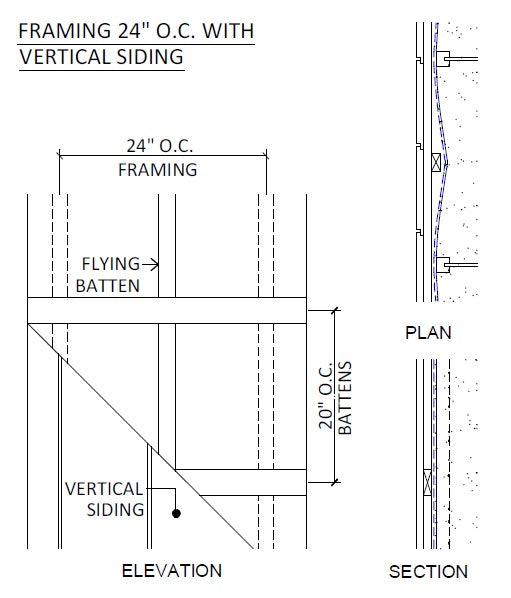
475 Flying batten - see construction details for more options
Subsequently, 9.5” TJIs were bolted into the existing framing members that luckily were 24”OC (more insulation less wood). On outside of these vertical members, we stapled SOLITEX MENTO Plus every 2" (see installation guide).At the inside edge of the window bucks, we cut both the SOLITEX MENTO Plus WRB and the reinforced plastic. This WRB was then taped to the window bucks with TESCON VANA tape.
To create a vented rain screen on top of this reinforced monolithic vapor open house wrap, we nailed 1x3s vertically to the TJIs. Horizontal 1x3s every two feet O.C. were added.
Concurrently with adding the horizontal battens, we added a vertical flying batten between the vertical 1x3s - see concept in detail [to the right]. This prevents the SOLITEX MENTO Plus membrane from pillowing too much and touching the siding when the cellulose is dense-packed into the TJI bays (the reinforcement is strong, but smaller compartments made by these battens will assure that the cellulose when packed at the right density won't settle as it is supported by the membrane and batten grid).
Next, we attached a primed and painted cedar bottom sill and covered it with Grace Vycor before covering it in galvanized sheet metal (475 note - for even better sills see EXTOSEAL Encors, a butyl/acrylic sill tape made in ProClima quality - sticks extremely well, super form-fitting, and self sealing).
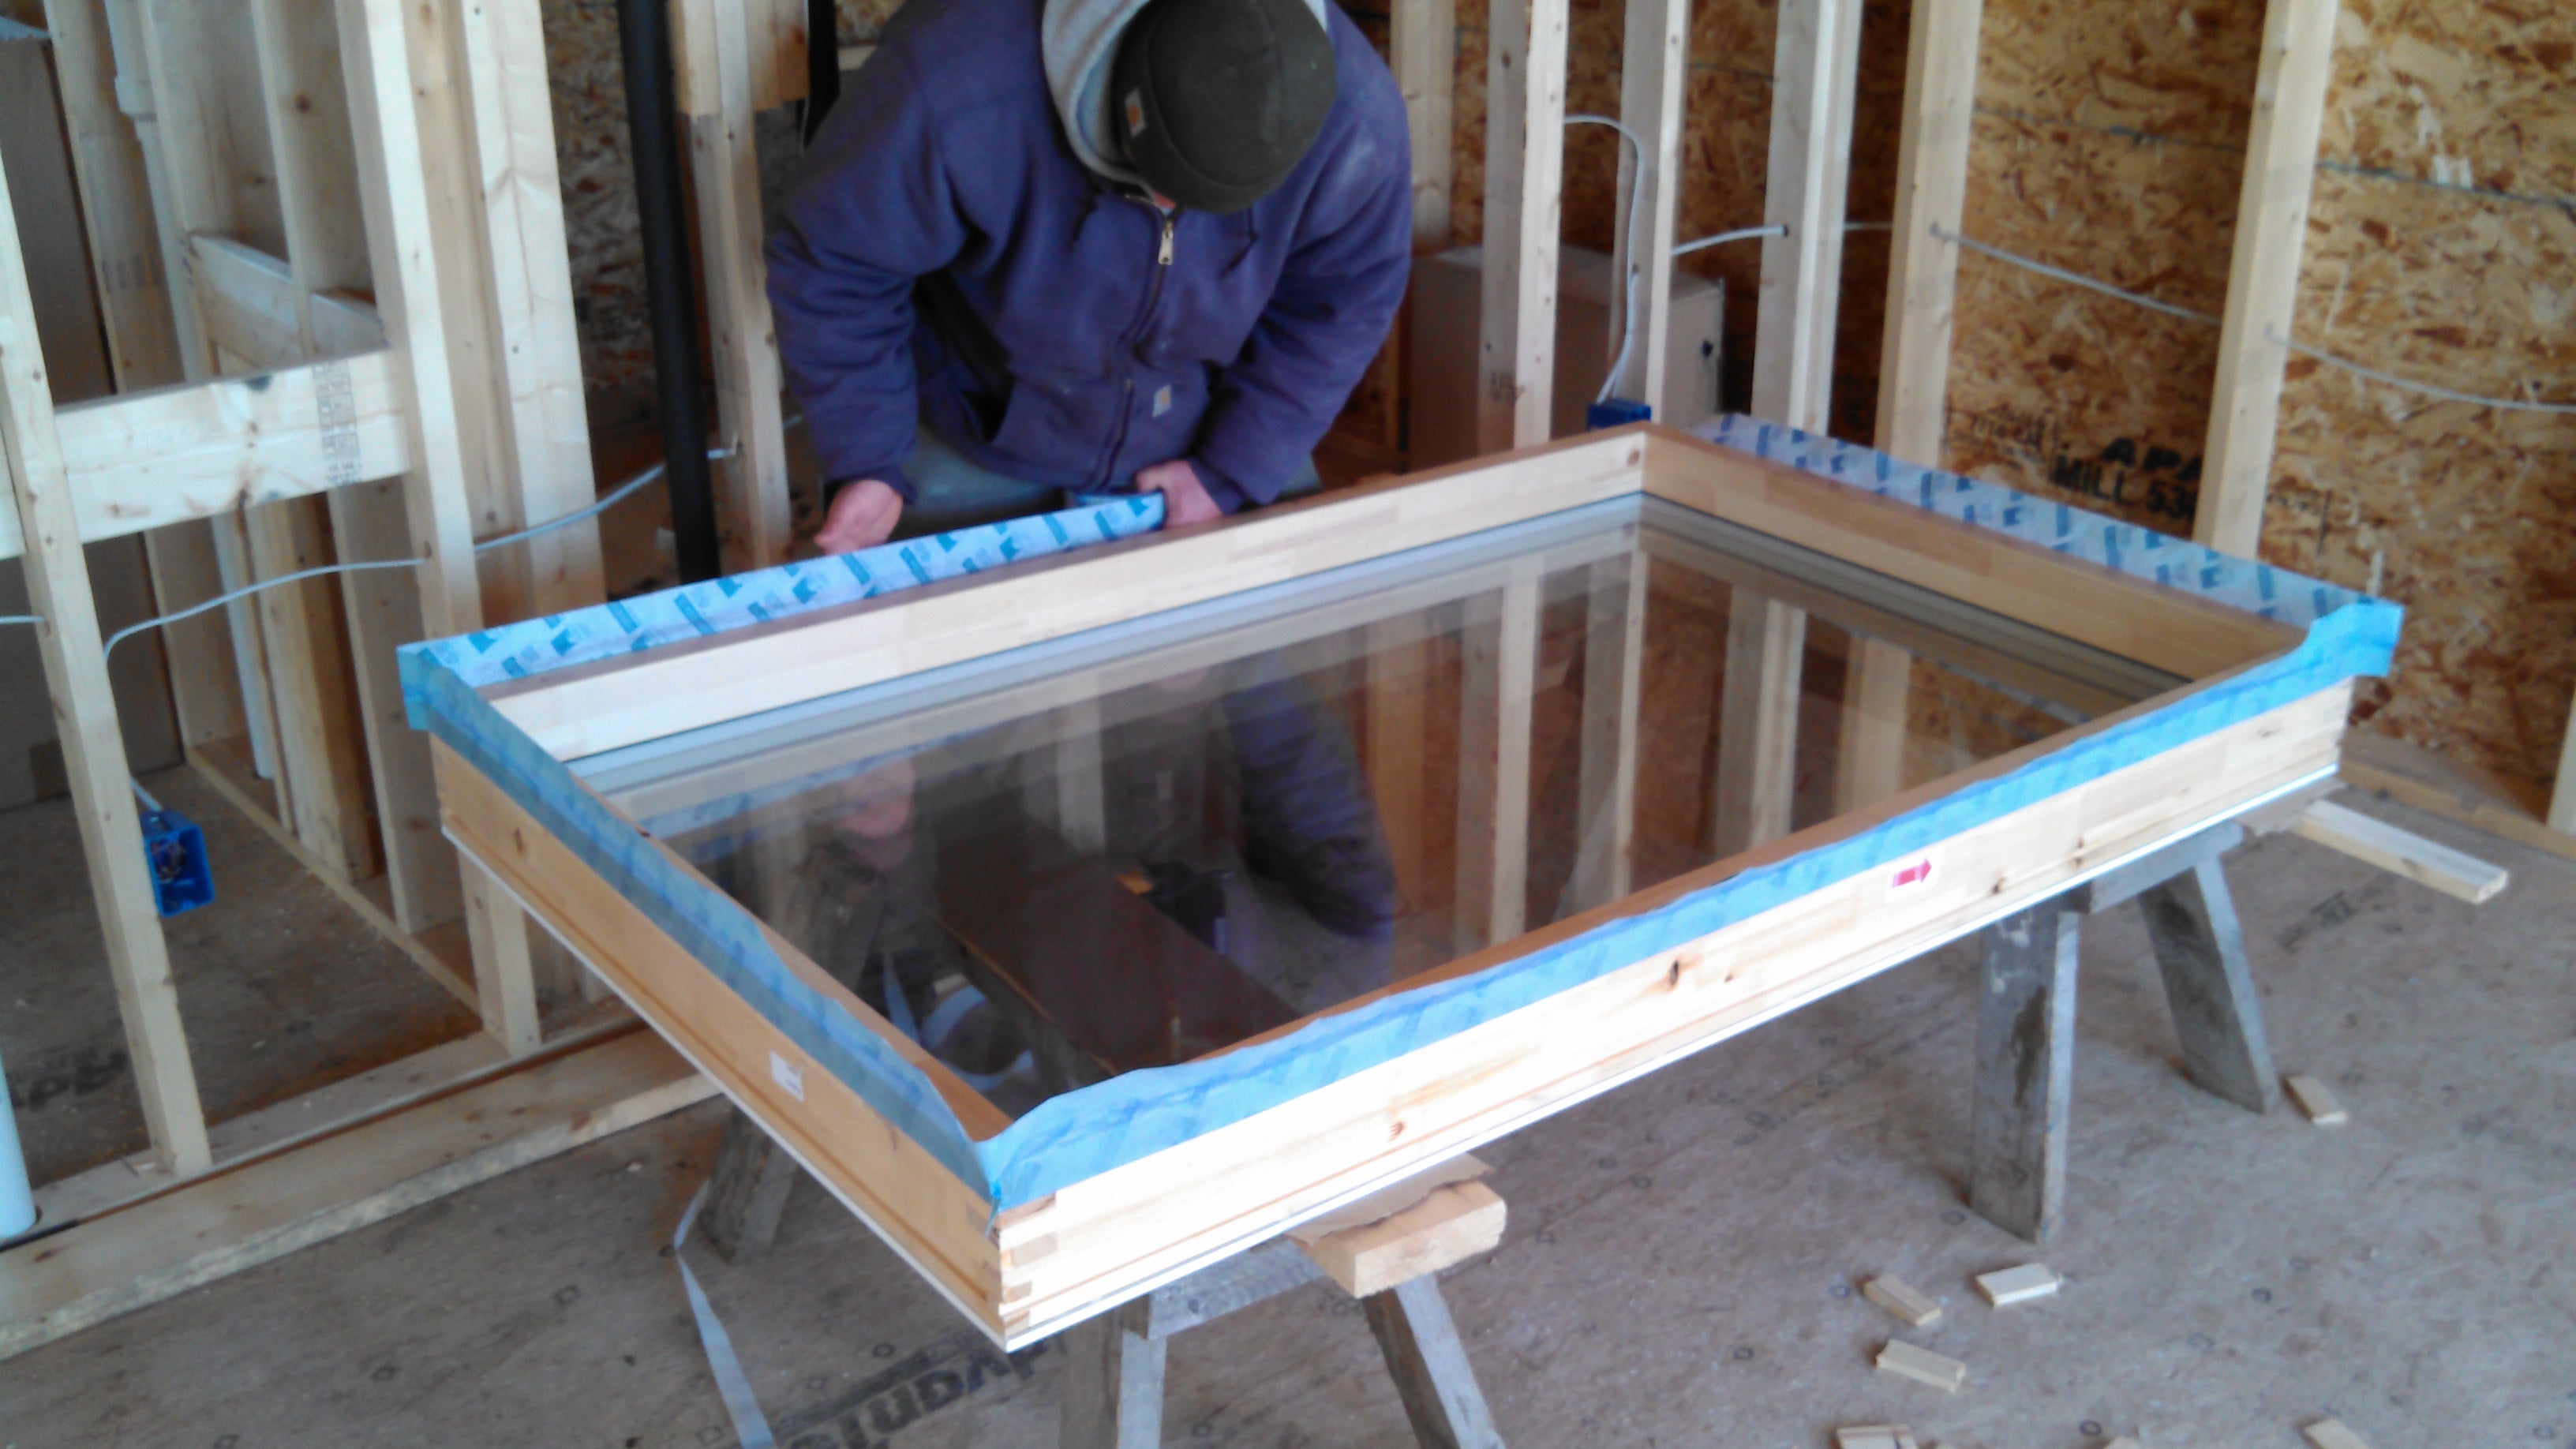
Pre-applying CONTEGA SL to the window frame

Rabbit ear in CONTEGA SL at window frame
On the sides and top, extension jams were installed. The window head was again flashed with galvanized sheet metal flashing that was in turn taped to the SOLITEX MENTO Plus. Pieces of 1x3s were used to help support the sill and extension jams.
Before we installed the windows we taped the inside of the double-sided CONTEGA SL tape to the inside edges of the window frames. Please note the use of 'rabbit ear' folds in the corners (see photo). This loop in the frame corner ensures the tape is properly connected all the way into the window buck corner. You need this additional tape length there because of the distance created between the frame and the buck - caused by the installation gap.

Window with CONTEGA SL on frame inserted into rough opening
The windows were put into the rough openings with tape already attached and after shimming the windows square and plumb. By screwing thought the jambs, the frames were securedinto the structure. For shimming we used color-coded shims from Denmark that incorporate a slick adjustable shim-like tool. The outside gap between the window and the cedar jam is closed with

CONTEGA SL* and EXO* pre installed on frame for zero clearance installation and optimum vapor profile of window installation
expanding foam tape since there is no visible frame from the outside on the Ecliptica windows - the sashes overlap the frame on the outside (475 note - Jesper could have installed CONTEGA EXO on this side of the frame. This would have made the same hidden zero clearance connection. The EXO tape is made from the same material as the SOLITEX MENTO 1000 membrane, and is very waterproof and actively vapor open, see image on left).
Later we spray-foamed the gap between the windows and the RO with low expanding foam. In the final step the excess foam was carefully removed, before taping the vapor retarding (perm 1.4) CONTEGA SL tape back to the OSB window buck.
*CONTEGA SOLIDO SL and CONTEGA SOLIDO EXO have since been replaced in our product offerings by CONTEGA SOLIDO IQ*

SOLITEX MENTO Plus with 1 patch of TESCON Invis (similar to VANA) during dense pack installation
The cellulose was blown in from the exterior. This was a big benefit as it prevented cellulose dust on the inside of the occupied house. We did this by cutting two 3" slices in the SOLITEX MENTO Plus with a utility knife and feeding the tube from the top down to the bottom of the bay. Blocking was installed in certain areas to separate the TJI bays from each other. This was done because if the bays are not contained, the cellulose can bleed into the next one, which makes it becomes much harder for our insulators to properly dense pack the cellulose (because it's impossible to count bags per bay for density estimation if they are not contained). The holes created by insulating are simply covered with more TESCON VANA tape (475 note -TESCON VANA 150 or VANA 200 are recommended tapes to get sufficient tape adhesion around the installation holes to the membrane - however it is of course also possible to ship-lap several pieces of regular TESCON VANA/INVIS).

Rip in ski jacket fixed with TESCON VANA
Our original doubts about the performance of the Vana tape were put to rest. We live in ski country and the Vana tape is so reliable and has such great adhesive quality that it’s our favorite tool to repair rips and holes in ski clothes, which constantly gets wet and dry, but the tape never gives up.
To finish this side of the house, we sided it with rough cut pine boards that had all end grain primed before installation.
The biggest problem right now is that the attic space is not properly airsealed. The plan is to make the attic space part of the conditioned space as the last step in the project. One of the reasons is that we have no way of making the current ceiling airtight. Partition walls on the inside are obvious leaks that we cannot address while we live there. Additionally the trusses above make it impossible to get a continuous air barrier in the attic floor and connect it to the DA on the outside.

Connection to continuous insulation layer in Foam-Free DER chain saw retrofit
So the plan to address this is - after we have done the remaining sides of the house - to remove what little overhangs remain on the roof (chainsaw retrofit...). We can then run SOLITEX MENTO Plus over the roof as a vapor open airbarrier and seal it to the DA on the wall. When we attached the TJI Larson trusses, an extra two feet of DA barrier was left on the top of the wall. This is so we could wrap it over the top of the TJIs and tape it to the exterior MENTO Plus barrier. This way we have a totally tight wall cavity until we can extend the ProClima WRB over the roof, and we can connect the SOLITEX MENTO membrane from the roof to the one on the walls as well (475 note - we recommend the detail above, in which the DA would connect to INTESANA on top of the roof - after that temporary roof underlayment/durable vapor variable airbarrier is installed, the TJI are added to the roof. These insulation cavities can then be covered with SOLITEX MENTO Plus and insulated just like the walls).
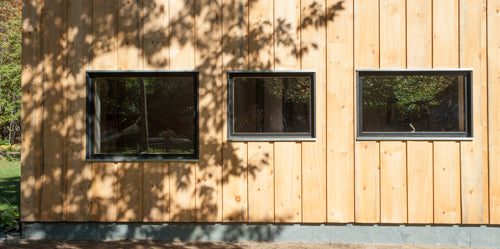
Finished exterior with rough cut siding
The cost of doing the one wall was around $16,000 which included all materials and labor. To complete the project we estimate spending an additional $60,000 which will include a ventilation system and a new roof. We hope to maintain the use of our wood stove which currently covers 95% of our annual heat demand, but we’re ready to install a mini split if the wood stove turns out to be impractical.

